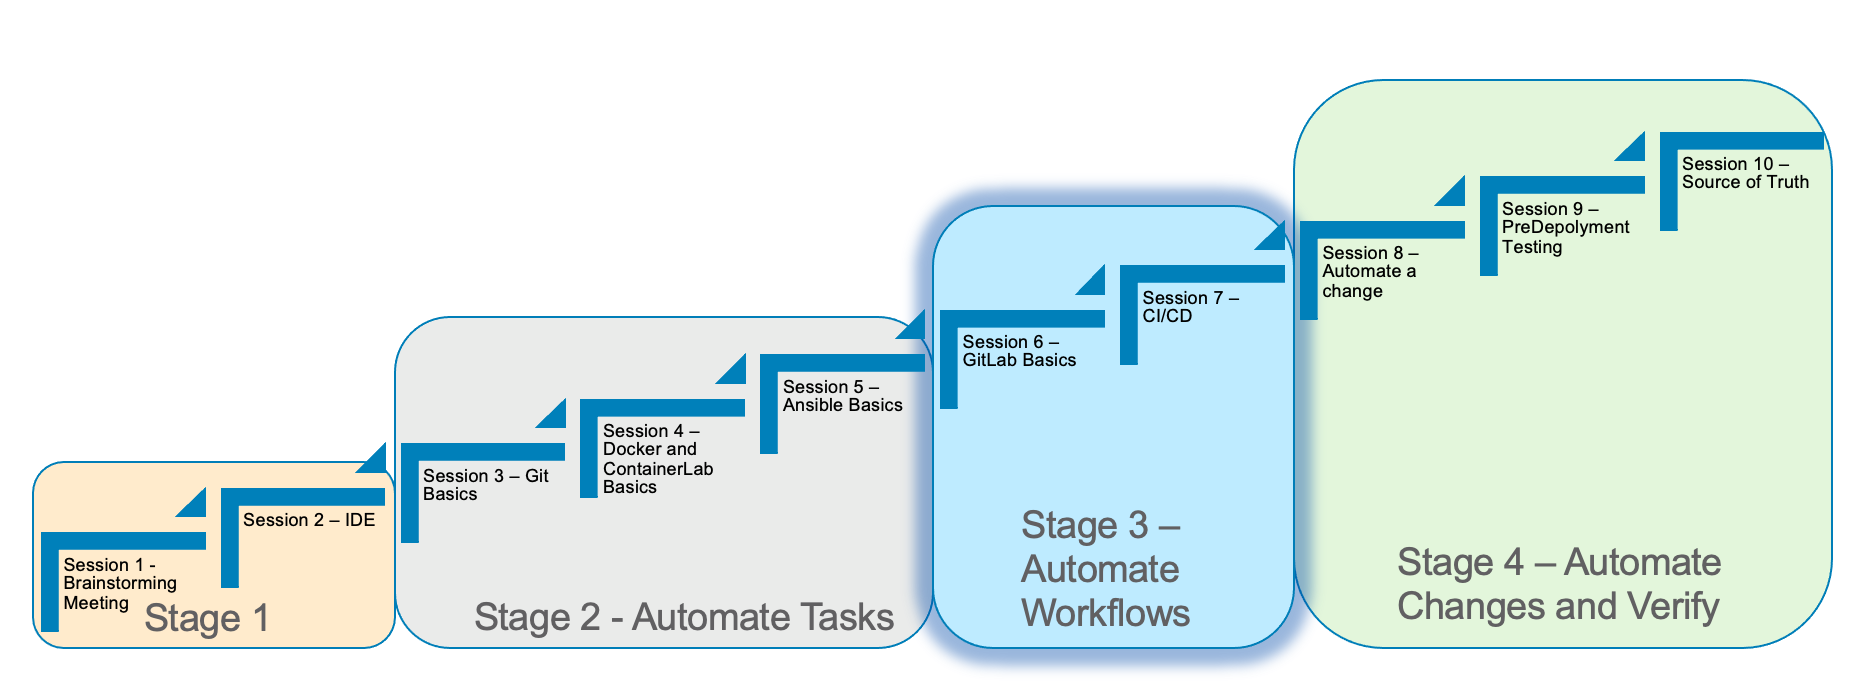
Stage 3 GitLab Basics
Estimated time to complete: 20 minutes
In Stage 3, we will discuss GitLab basics.
We will run through some of the concepts to understand the power of GitLab.
Understanding the GitLab server is a key part of infrastructure automation.
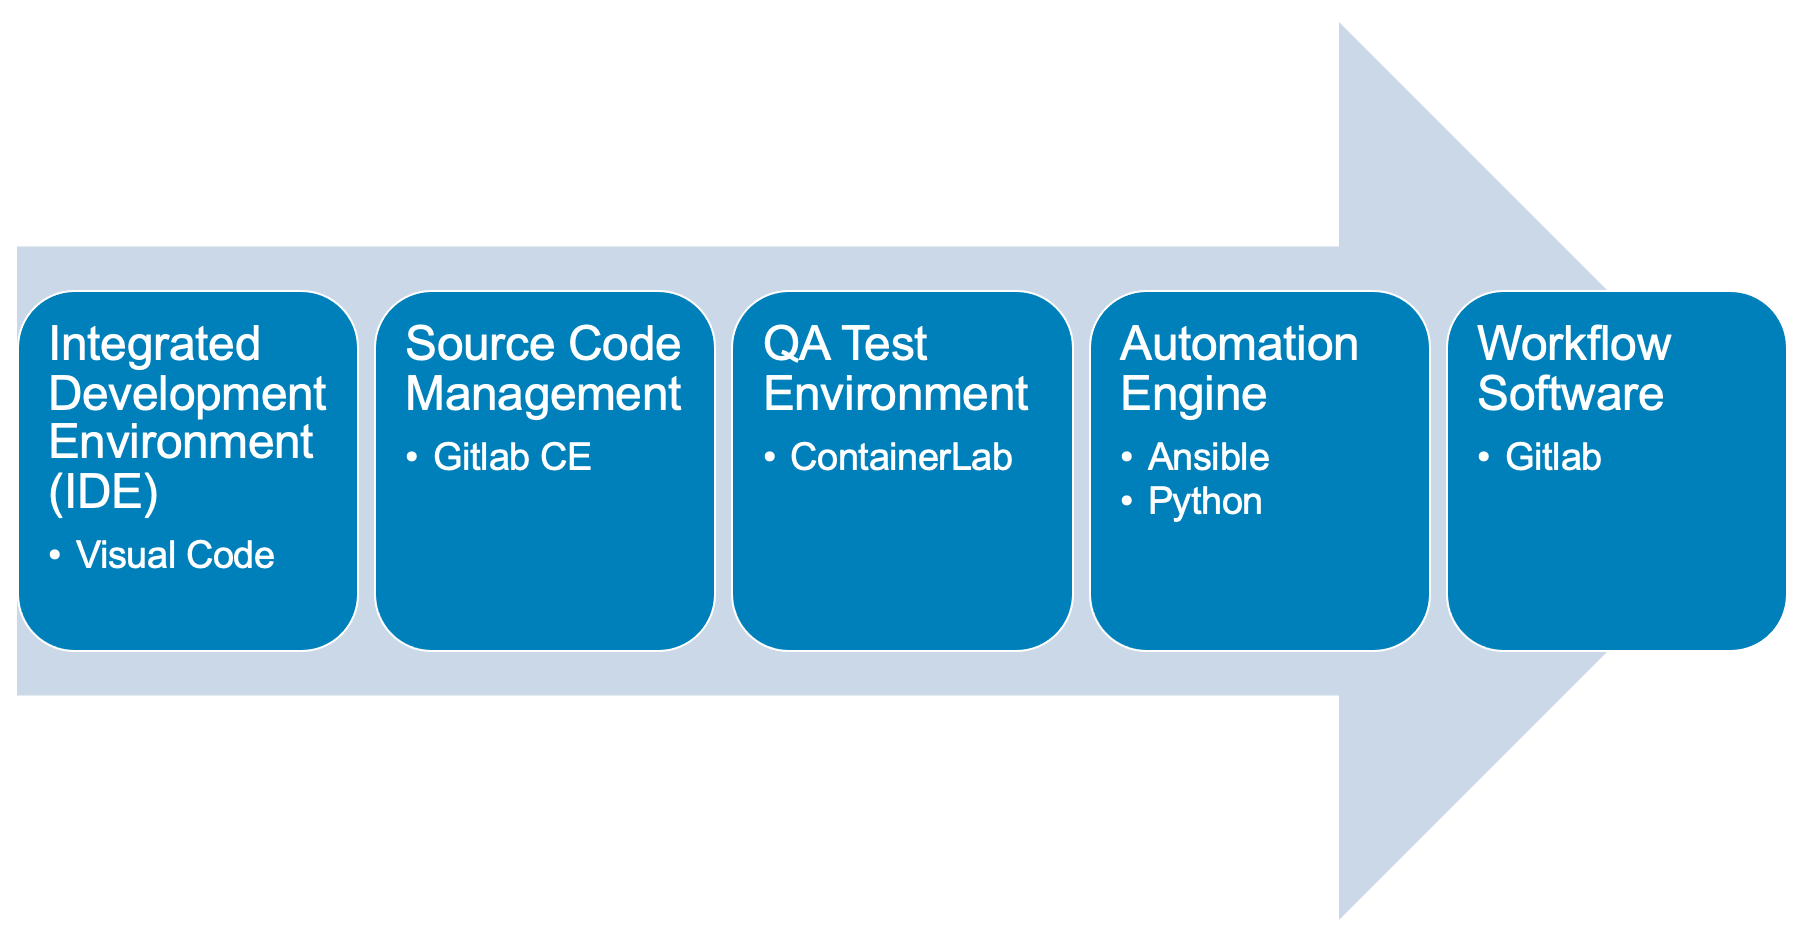
Here are the requirements for Stage 3
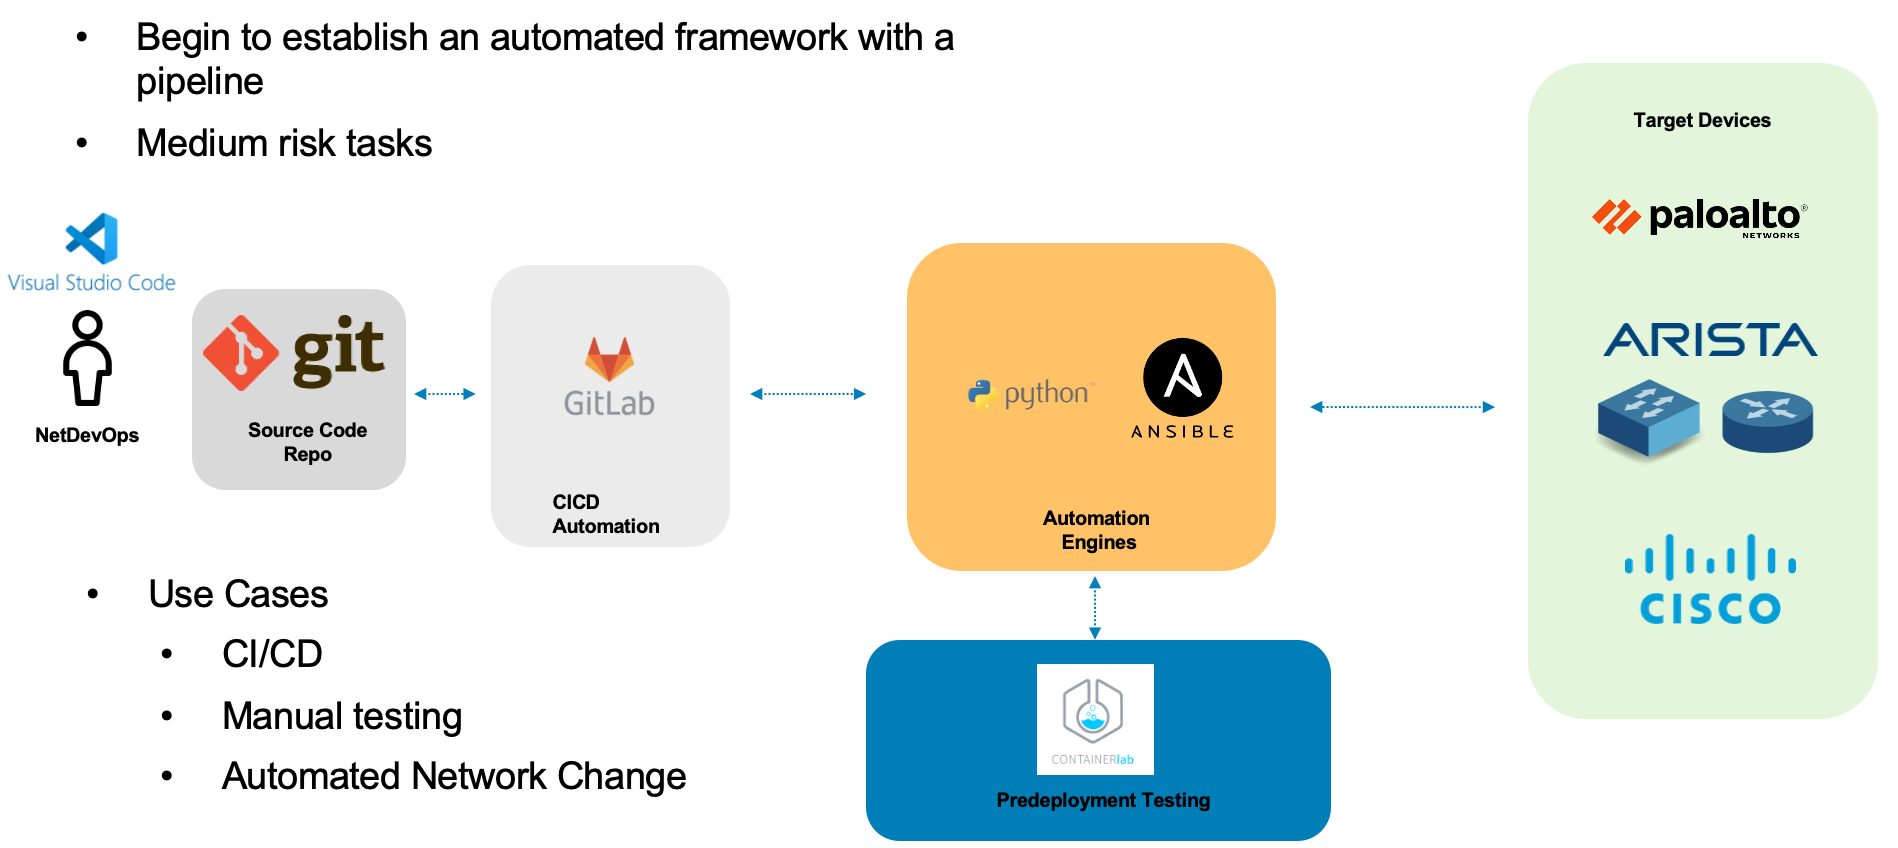
Here is a diagram of Stage 3. This shows all the technology we will be using in Stage 3.
It also defines the use cases we will be working on in Stage 3.
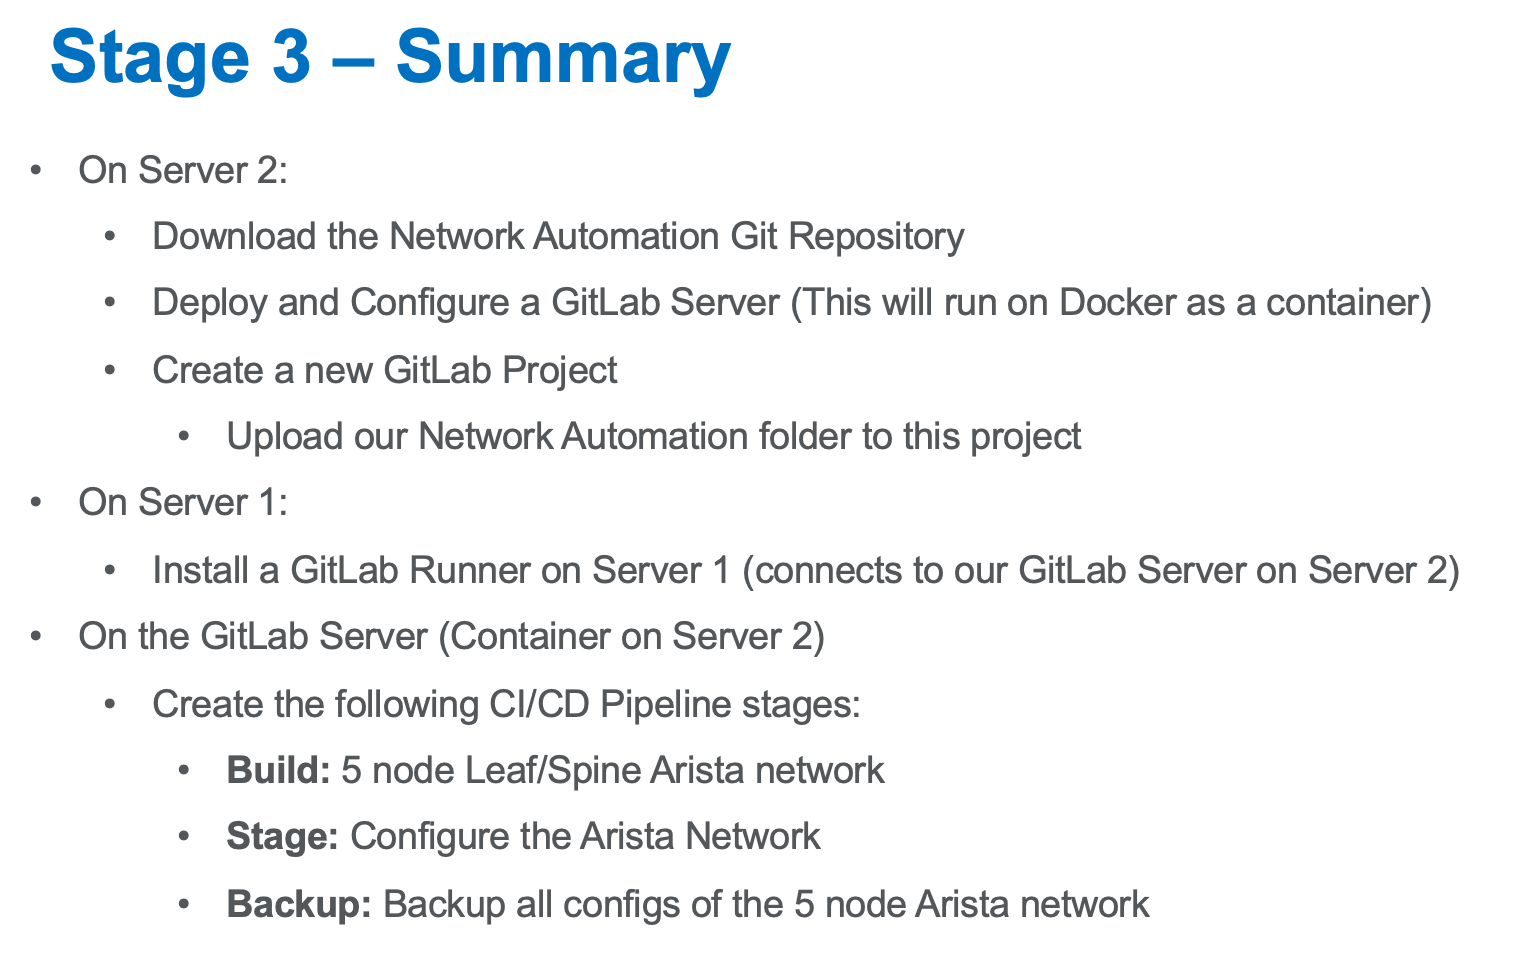
Here is a summary of Stage 3
From Your Second Server
Run the following commands from the home directory
cd ~/network-automation/infra/gitlab
vi gitlab-dc-2.yaml| Change the hostname and external url (the URL needs to be in DNS server or your host file.) |
version: '3.7'
services:
  web:
    image: 'gitlab/gitlab-ce:latest'
    container_name: gitlab-ce
    restart: unless-stopped
    hostname: 'ed26757f4b2c.mylabserver.com' (1)
    environment:
      GITLAB_OMNIBUS_CONFIG: |
        # Add any other gitlab.rb configuration here, each on its own line
        external_url 'http://ed26757f4b2c.mylabserver.com' (1)
    ports:
      - '2222:22'
      - '80:80'
      - '8443:443'
    volumes:
    - '~/srv/gitlab/config:/etc/gitlab'
    - '~/srv/gitlab/logs:/var/log/gitlab'
    - '~/srv/gitlab/data:/var/opt/gitlab'
    shm_size: '2gb'
type i to insert in vi, make your changes to the file and press esc
Shift + zz to save the file and exit
| 1 | Change the hostname and external url (the URL needs to be in DNS server or your host file.) |
Run the following commands:
cd ~/network-automation/infra/gitlab
docker-compose -f gitlab-dc-2.yaml up -d
cloud_user@ed26757f4b2c:~$ cd ~/network-automation/infra/gitlab cloud_user@ed26757f4b2c:~/network-automation/infra/gitlab$ docker-compose -f gitlab-dc-2.yaml up -d Creating network "gitlab_default" with the default driver Pulling web (gitlab/gitlab-ce:latest)... latest: Pulling from gitlab/gitlab-ce 44ba2882f8eb: Pull complete 8fb498f93123: Pull complete e3d9eb42a8a1: Pull complete e12e5f53f387: Pull complete 07af258bd5cf: Pull complete e67086a39069: Pull complete 0618726461d6: Pull complete c1d678382927: Pull complete Digest: sha256:62165f88747fc33220a3c0229357b775c3358d3fad3ca8e4c7ca9ff6a2b05395 Status: Downloaded newer image for gitlab/gitlab-ce:latest Creating gitlab-ce ... done
| Wait for the server status to be fully "healthy". You can check by the "docker ps" command. This takes ~5 mins. |
cloud_user@ed26757f4b2c:~/network-automation/infra/gitlab$ docker ps
CONTAINER ID   IMAGE                     COMMAND             CREATED         STATUS                   PORTS                                                                                                               NAMES
03b5a344de2c   gitlab/gitlab-ce:latest   "/assets/wrapper"   5 minutes ago   Up 5 minutes (healthy)   0.0.0.0:80->80/tcp, :::80->80/tcp, 0.0.0.0:2222->22/tcp, :::2222->22/tcp, 0.0.0.0:8443->443/tcp, :::8443->443/tcp   gitlab-ce
See how fast it is to create a GitLab Server 🤯
Run the following commands to get the initial root password
docker exec -it gitlab-ce grep 'Password:' /etc/gitlab/initial_root_passwordCapture the initial password and browse to the server
http://Server2 (1)
| 1 | Replace Server 2 with your host information |
Enter root as the username and paste in the initial password
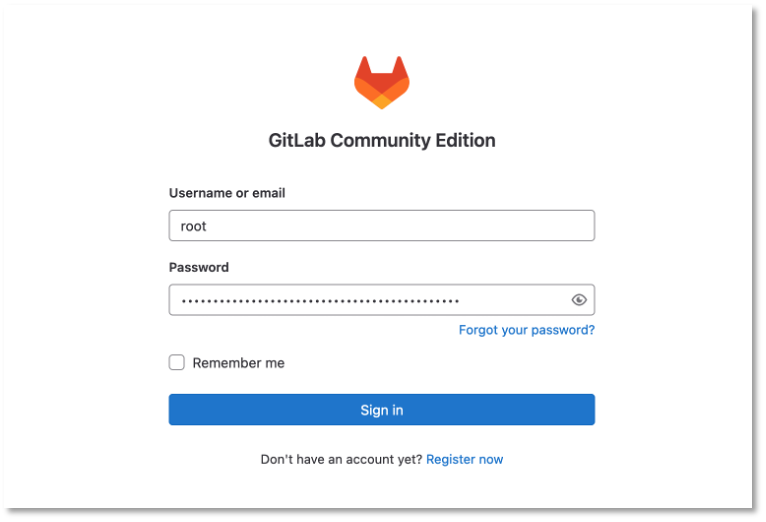
Figure 1: Login to Gitlab
Browse around and feel free to learn more about Gitlab
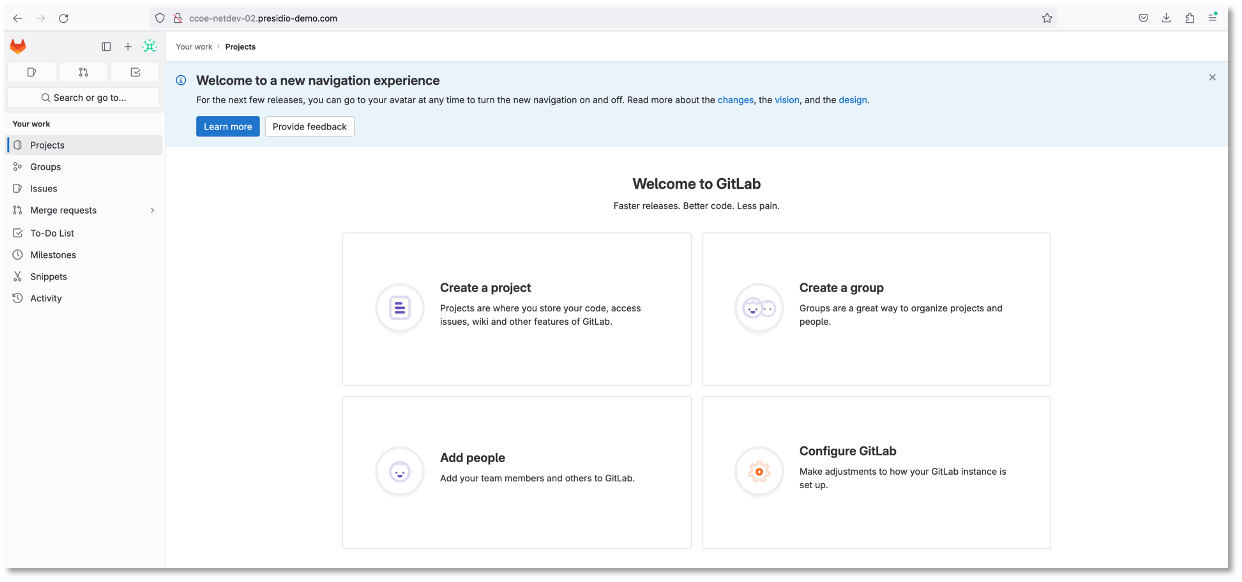
Figure 2: Home Screen
Before we proceed, it is worth changing a few portal settings
Turn off open registration for everyone
To do this, click the Deactivate button available on the upper bar with a warning
http://Server2/admin/application_settings/general#js-signup-settings (1)| 1 | Replace Server 2 with your host information |
On the new page, uncheck Sign-up enabled to deactivate. Then scroll down and click Save Changes
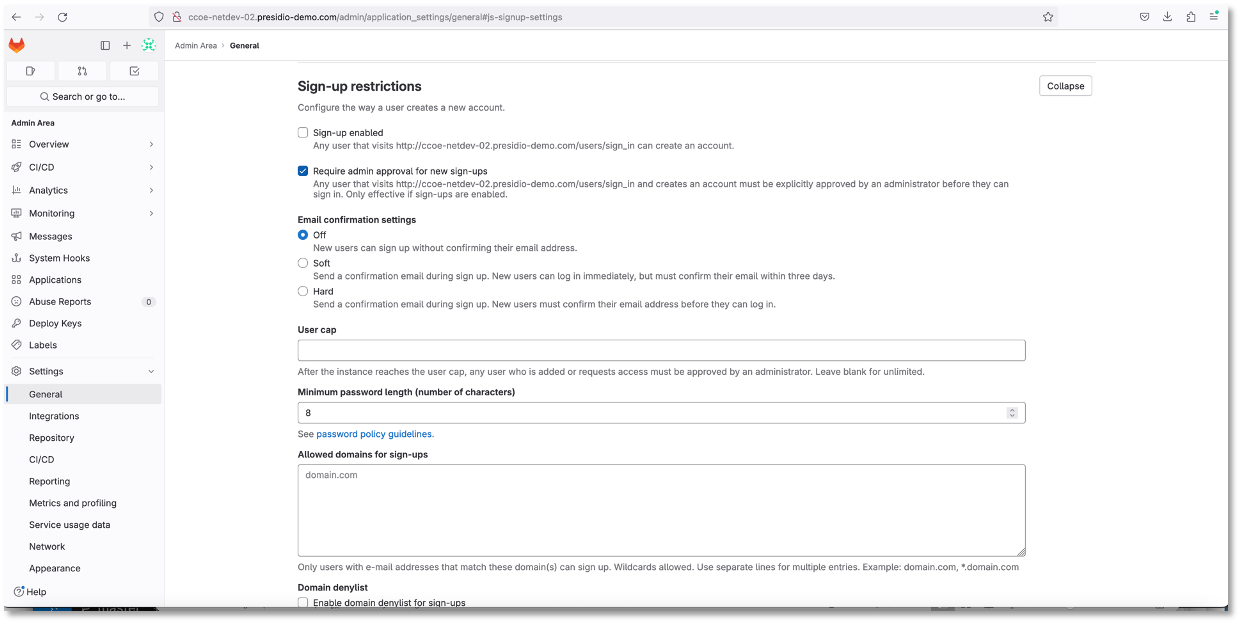
Figure 3: Open Registration
Before we proceed, it is worth changing the root password
To do this, go to the page:
http://Server2/-/profile/password/edit (1)and enter a temporary password and a new password.
| 1 | Replace Server 2 with your information |
We approve the change by clicking Save password and log back in as root
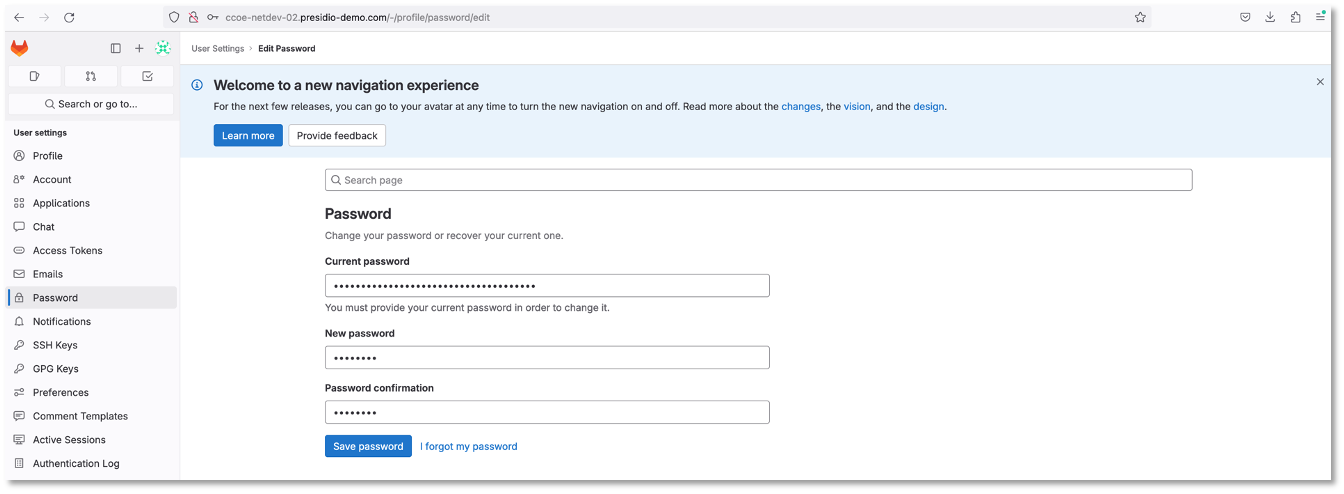
Figure 4: Change Root Password
Let check out the Admin area
http://Server2/admin (1)| 1 | Replace Server 2 with your information |
Let’s create a new user
Click the New User button
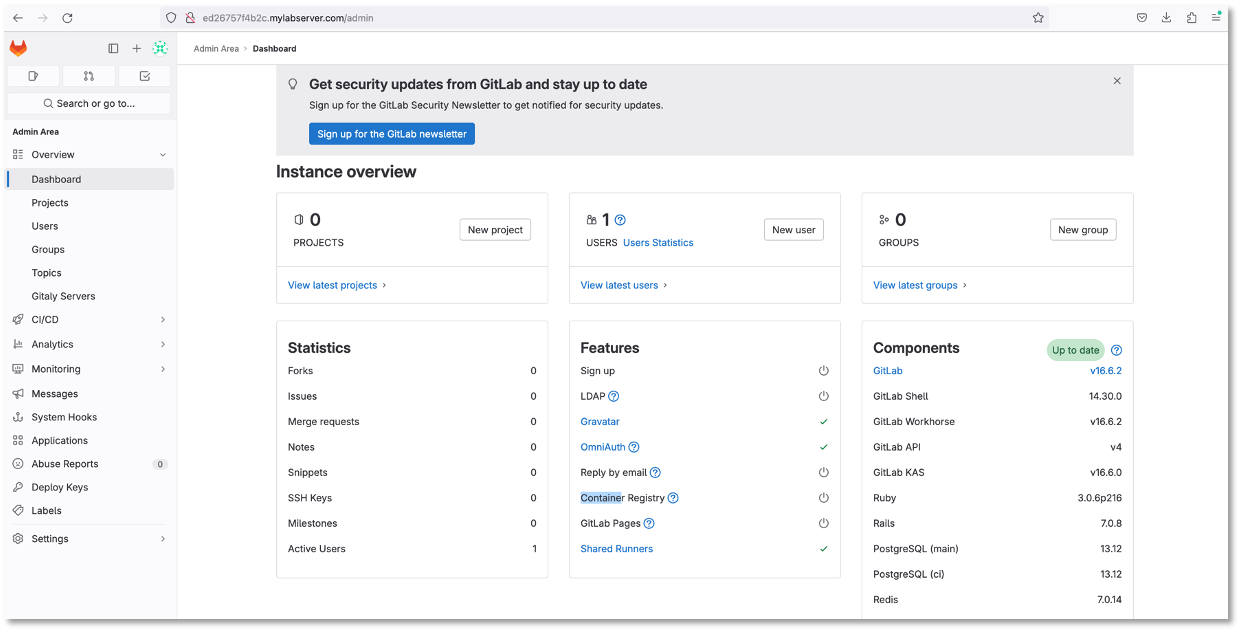
Figure 5: Admin Portal
Enter in your information to create the User and click create user
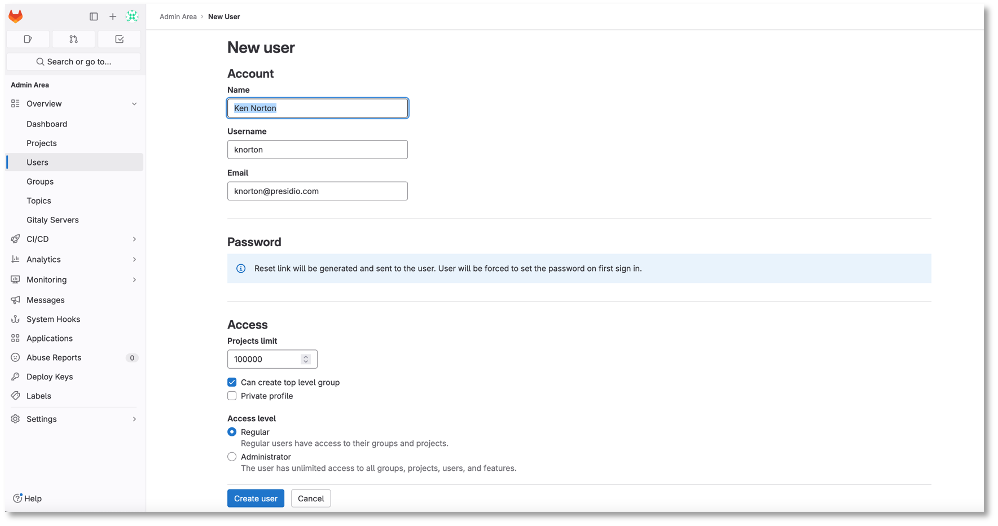
Figure 6: New User
Click edit to create a password for the user
Edit the user in the upper right to change the password
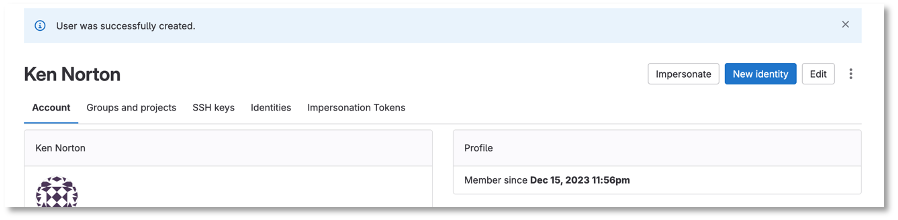
Figure 7: Edit password
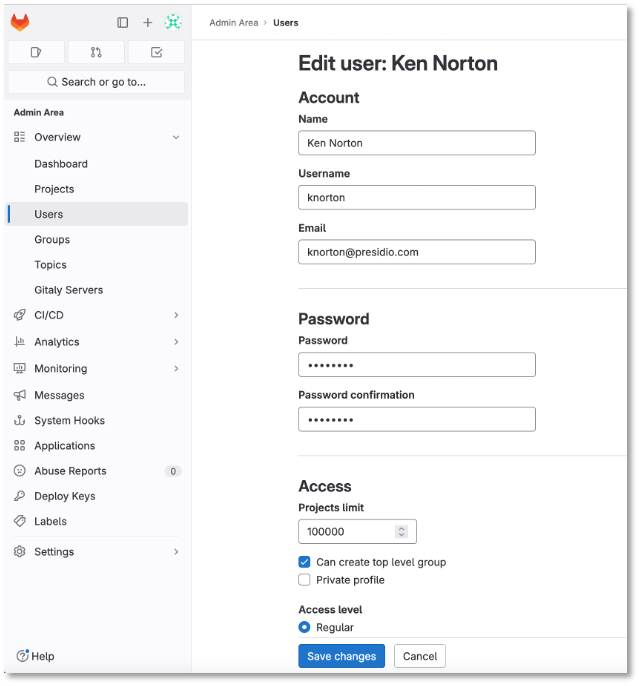
Figure 8: Change Password
Save Changes
Logout of root and login with the new user account
Let’s create a blank project
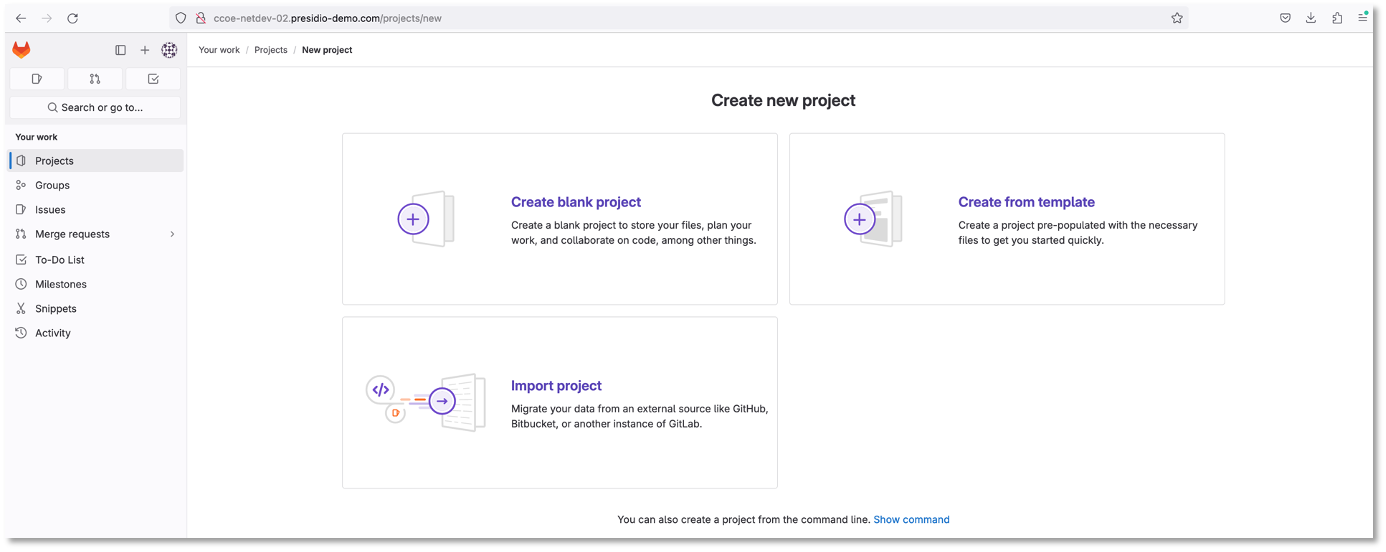
Figure 9: Create a New Project
Call the project Network Automation
| Click internal for a visibility level and uncheck Initialize repository with a README |
Check Internal
Uncheck Initialize repository with a README
Click Save
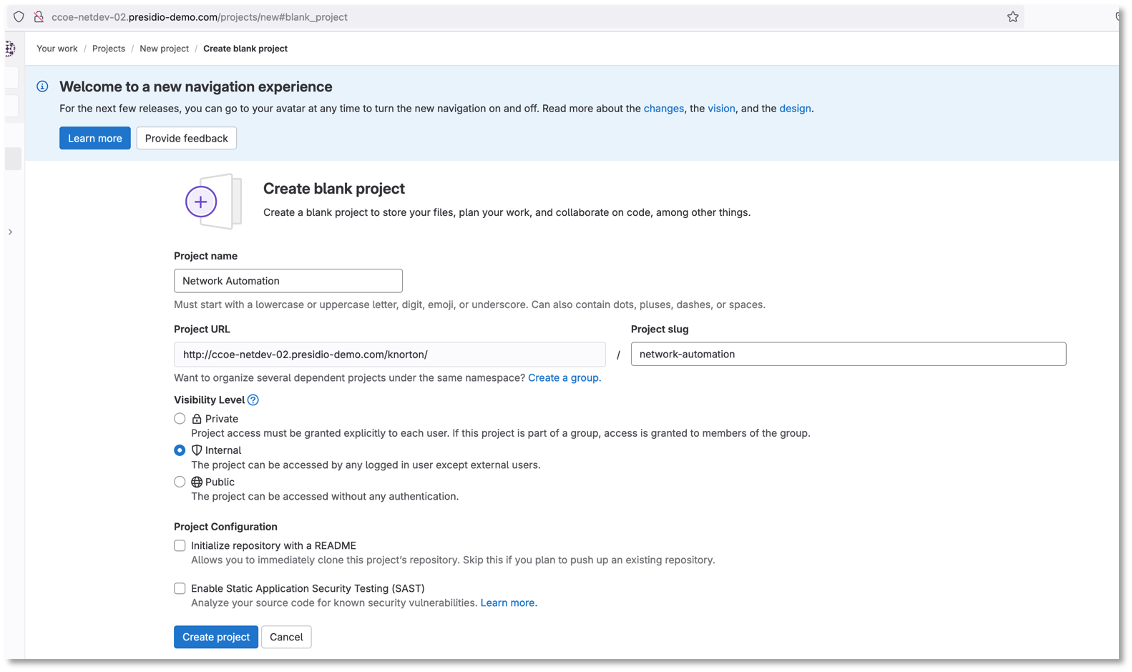
Figure 10: Create Network Automation Project
Under the Push to an Existing Folder section
Copy the following command to your clipboard (but don’t yet run the command):
git remote add origin http://server2/knorton/network-automation.git (1)| 1 | Your FQDN in the URL will be different than the one above |
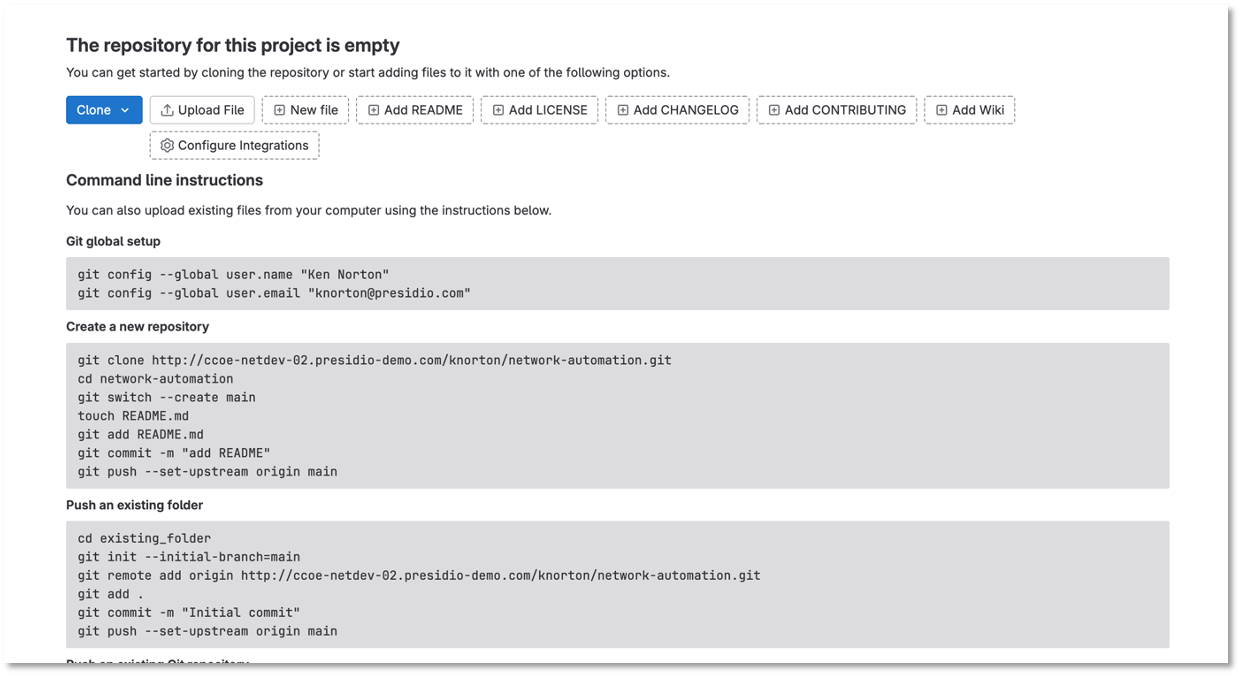
Figure 11: Git Remote
Go back to the server terminals and Visual Studio Code IDE on you workstation
In all the locations where you have downloaded the repository
We need disassociate our cloned repository and point it to your new Gitlab-CE server.
| You only need to run the git push origin main from one location |
Enter the following commands like the picture below shows
cloud_user@ed26757f4b2c:~/network-automation$ git remote -v
origin  https://github.com/knorton3/network-automation.git (fetch)
origin  https://github.com/knorton3/network-automation.git (push)
cloud_user@ed26757f4b2c:~/network-automation$ git remote remove origin (1)
cloud_user@ed26757f4b2c:~/network-automation$ git remote add origin http://server2/knorton/network-automation.git (2)
cloud_user@ed26757f4b2c:~/network-automation$ git push origin master
Username for 'http://server2': knorton (3)
Password for 'http://knorton@server2': (4)
Enumerating objects: 273, done.
Counting objects: 100% (273/273), done.
Delta compression using up to 2 threads
Compressing objects: 100% (168/168), done.
Writing objects: 100% (273/273), 391.62 MiB | 10.65 MiB/s, done.
Total 273 (delta 119), reused 209 (delta 87)
remote: Resolving deltas: 100% (119/119), done.
To http://server2/knorton/network-automation.git
 * [new branch]      master -> master
| 1 | Removing the original origin |
| 2 | Your FQDN in the URL will be different than the one above |
| 3 | When prompted for the Username. Use the newly created user you just made. |
| 4 | When prompted for the Password. Use the newly created user you just made. |
Hit refresh on your browser pointing to your GitLab Server and notice all the files from the original repository are now there
Notice all the commit comments are still there
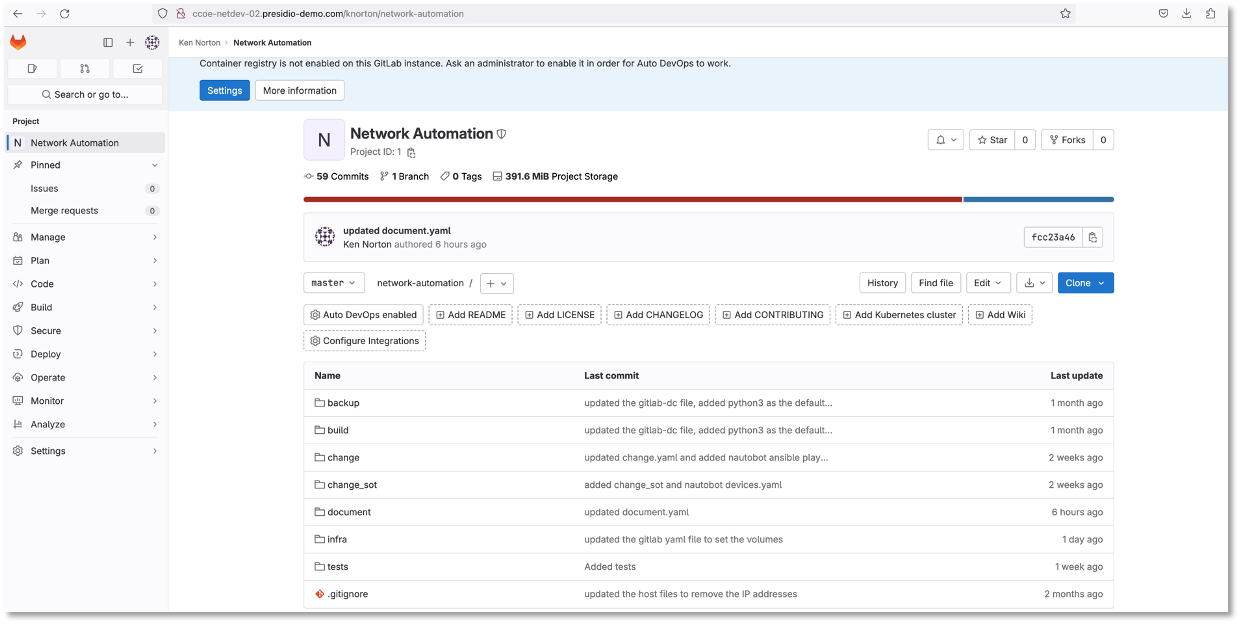
Figure 12: Network Automation Repository