sudo ansible-galaxy install redhatofficial.rhel7_stig -p /etc/ansible/rolesExercise Description
In this exercise, we are going to use Red Hat Ansible Tower to run a DISA STIG evaluation of our environment.
-
DISA STIG controls https://galaxy.ansible.com/redhatofficial/rhel7_stig
Step 1: Download role to Ansible roles directory
In your wetty window (if you closed it, see the SETUP step, in your workbook), type the following:
The image below illustrates that the role has been downloaded to your system-wide Ansible roles directory, /etc/ansible/roles:
- downloading role 'rhel7_stig', owned by redhatofficial
- downloading role from https://github.com/RedHatOfficial/ansible-role-rhel7-stig/archive/0.1.44.tar.gz
- extracting redhatofficial.rhel7_stig to /etc/ansible/roles/redhatofficial.rhel7_stig
- redhatofficial.rhel7_stig (0.1.44) was installed successfully
Step 2: Select Projects
Click the Projects tab, in the Ansible Tower UI. ![]()
Step 3: Click Add
Next, Select ![]()
Step 4: Complete the Project form
Complete the project form, using the following entries:
NAME |
Ansible STIG Project |
DESCRIPTION |
STIG Role Playbook |
ORGANIZATION |
Default |
SCM TYPE |
Git |
SCM URL |
|
SCM BRANCH |
|
SCM UPDATE OPTIONS |
|
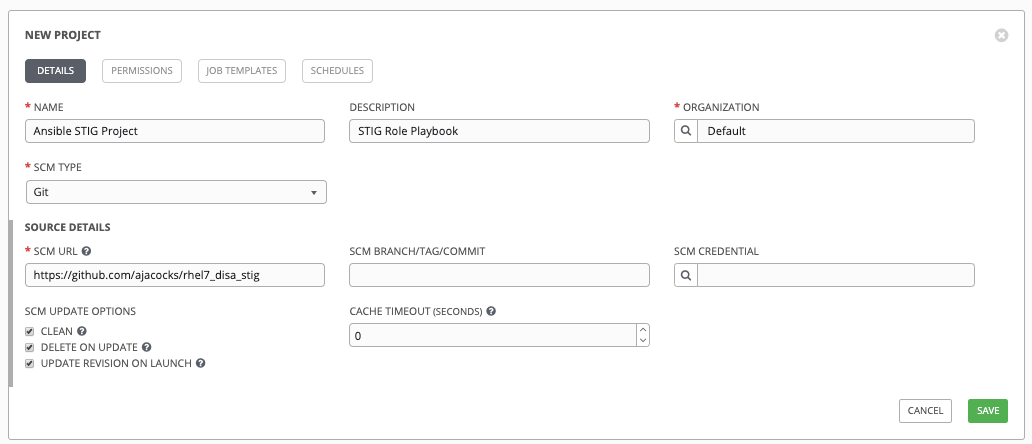
Figure 1: Defining a Project
Step 5: Save
Select SAVE ![]()
Step 6: Select Template tab
In your Tower window, click TEMPLATES
Step 7: Add the job template
Click ADD ![]() , and select
, and select JOB TEMPLATE
Step 8: Complete the job Template form
Complete the form using the following values. Note that the PLAYBOOK field should offer main.yml as an option, when clicked.
NAME |
STIG Job Template |
DESCRIPTION |
Template for security playbooks |
JOB TYPE |
Run |
INVENTORY |
Ansible Workshop Inventory |
PROJECT |
Ansible STIG Project |
PLAYBOOK |
main.yml |
MACHINE CREDENTIAL |
Ansible Workshop Credential |
LIMIT |
web |
SKIP TAGS |
|
OPTIONS |
|
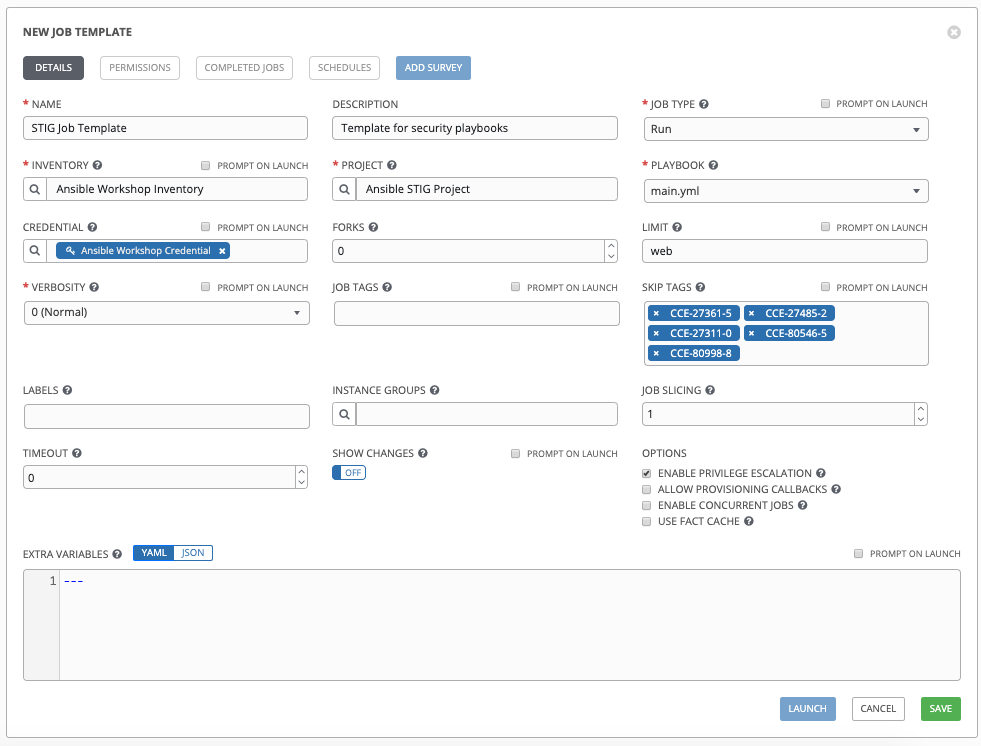
Figure 2: Defining a Job
Step 9: Save the template and run it
Click SAVE  , to store your new template, and we are ready to run it.
Click the rocketship icon ![]() next to the
next to the STIG Job Template entry, to launch the job.
View what the job looks like as it is executing, as well as what the SCAP results look like, when uploaded to your second node, in the panel, below.


Step 10: Observe the scanning process and view reports
You can watch the scan run against your managed node. Note that each compliance check is named and detailed.
Once the check is complete, you can open a new tab in your web browser, and navigate to the following URL, where workshopname is the workshop prefix, and # is the number that your instructor gave you:
http://example.node.0.redhatgov.io/scapClick the link called scan-xccdf-report-… to review the SCAP report that was generated. Note the failures in the report; look at the machines, if you want, via your Wetty ssh session, to analyze what the problems might be.